How to Install a Car Stereo Step by Step

Installing a car stereo is more than sliding a new receiver into the dashboard. It involves wiring, vehicle data systems, speaker loads, and careful trim removal. This guide explains car stereo installation in a practical, step-by-step way.

The market remains relevant. S&P Global Mobility reported that the average age of U.S. vehicles reached 12.6 years in 2024. Older vehicles often need refreshed audio systems, even when their engines remain reliable. Grand View Research also identifies smartphone connectivity and integrated infotainment as major forces shaping the car audio market. That integration creates a problem. A modern stereo may control steering-wheel buttons, parking sensors, or factory amplifiers.

“Protect the vehicle first, then improve the sound,” says Chris Cook, a MECP-focused mobile electronics trainer. That principle should guide every connection. Disconnect the battery before handling wiring. Use a vehicle-specific harness whenever possible. Test each speaker before reinstalling the dashboard.

Expect small mistakes. A trim clip may break. A ground point may look clean but perform poorly. I once underestimated how tightly a factory panel was fitted; patience would have saved time. The goal is not merely louder music. It is a secure, serviceable installation with no rattles, warning lights, or exposed wires.

You will learn how to identify the correct receiver, map the wiring, remove panels safely, connect accessories, test the system, and finish the dashboard cleanly. A multimeter, panel tools, wire strippers, crimpers, and patience matter as much as the stereo itself.
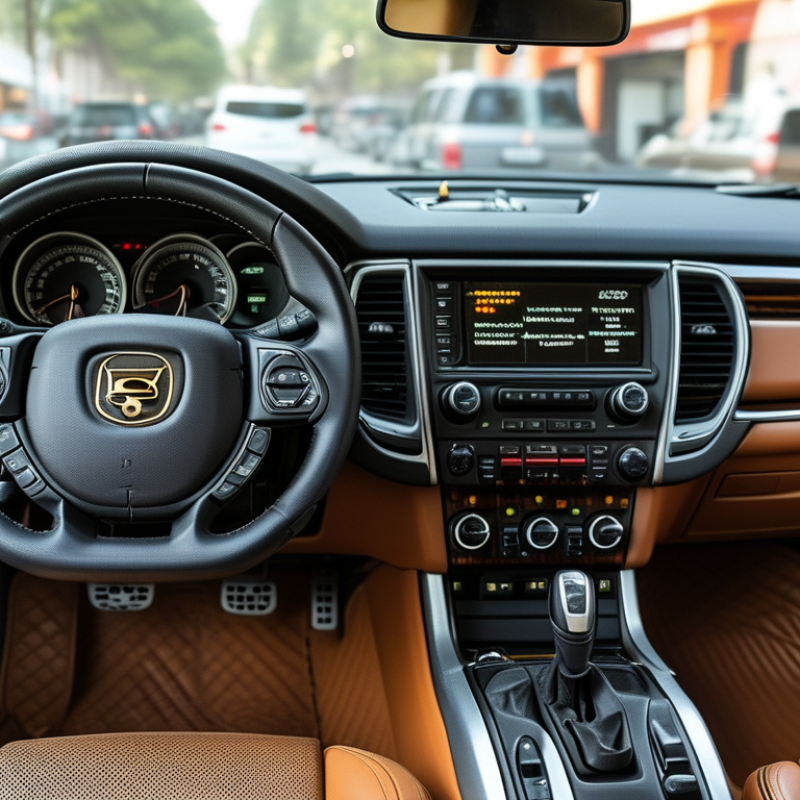
How to Install a Car Stereo Step by Step

Prepare Tools, Safety Equipment, and the Replacement Stereo

Before installing a car stereo, gather the right tools and protect the vehicle’s electrical system. You will need a trim removal tool, screwdrivers, a socket set, wire strippers, crimpers, electrical tape, and a digital multimeter. Keep a flashlight nearby. It helps in cramped dashboards. Wear safety glasses and insulated gloves, especially when working near sharp metal brackets. Read the vehicle manual and replacement stereo instructions before removing anything. Confirm the stereo’s size, connector type, and mounting depth. A unit that fits the opening may still interfere with vents or wiring.

Park on level ground and switch off the ignition. Remove the negative battery cable, then secure it away from the terminal. This reduces the risk of short circuits and protects sensitive electronics. Save radio presets or other settings if the vehicle supports that feature. Label unfamiliar wires instead of guessing. A compatible wiring adapter is usually safer than cutting factory wires. Test each connection with a multimeter and check that polarity matches the instructions. I once rushed this step and had to redo a loose ground connection. That mistake was avoidable. Before tightening the stereo, reconnect the battery briefly and test power, speakers, buttons, and display functions. Keep loose screws in a small container. Missing one is surprisingly easy. Disconnect the battery again before final mounting.


Disconnect the Battery and Remove the Factory Stereo

Before touching the dashboard, park on level ground, switch off every accessory, and remove the ignition key. Open the hood and identify the battery’s negative terminal. Disconnect it with the correct socket, then secure the cable away from the post. Do not let the tool bridge both terminals. Wait for the vehicle maker’s specified discharge period, especially when airbag systems are installed. Some vehicles may lose clock, radio, or window settings. Record them first. Take photos.

A common mistake is pulling the stereo before checking the service instructions. Modern dashboards often hide screws beneath trim panels, and forcing clips can leave visible marks. Use a plastic trim tool, a small flashlight, and a labeled container for fasteners. Remove panels gently, working around the edges rather than twisting one corner. Disconnect wiring plugs by their locking tabs. Never pull the wires themselves. Avoid yellow airbag connectors and do not test them with ordinary electrical probes.

S&P Global Mobility’s 2024 vehicle-age study reports that the average U.S. light vehicle reached 12.6 years. That age supports careful replacement work, but older plastics can be brittle. Stop if a panel resists. Check the vehicle-specific wiring diagram before loosening the stereo bracket. The Auto Care Association’s 2024 Joint Channel Forecast also shows continued growth in vehicle maintenance demand, reinforcing the value of accurate, documented installation practices. Reconnect the battery only after exposed terminals are insulated and the new wiring is checked. One missed ground can waste an afternoon.

Identify Wires and Connect the New Stereo Harness

Before installing a car stereo, disconnect the negative battery terminal and remove the old unit carefully. Take a clear photo of the existing wiring before cutting anything. This small step can prevent confusion later. Use the vehicle’s wiring diagram to identify constant power, switched power, ground, speakers, illumination, and antenna wires. Wire colors often vary between vehicles, so never trust color alone. Test each wire with a multimeter and confirm its function.

Match the vehicle wires with the new stereo harness, not by guessing, but by verified purpose. Join each connection with a proper crimp connector or carefully secured solder joint, then cover it with heat-shrink tubing. Keep speaker wires separated from exposed metal. Check polarity carefully; reversed speaker connections may produce weak bass and an uneven soundstage. I once relied on a familiar color pattern and had to reopen the dashboard. That mistake was avoidable. Slow down.

Label every confirmed wire with small pieces of tape. Leave enough slack behind the stereo for future inspection, but avoid loose bundles near pedals or sharp brackets. Connect the ground to clean, bare metal when required by the installation instructions. Before pushing the stereo into place, reconnect the battery and test power, speakers, memory settings, and steering controls. If one function fails, switch the battery off again and inspect the harness rather than forcing the unit into the dash.

Install the Stereo Receiver and Reconnect the Dashboard

With the battery disconnected, slide the new stereo receiver into the mounting sleeve. Keep the wiring visible and organized. Match each vehicle wire with the correct adapter connection. Secure every connection firmly, then protect exposed joins with electrical insulation. Never twist loose wires together and hide them behind the dashboard.

Before pushing the receiver fully into place, reconnect the antenna and wiring harness. Check that each plug clicks into its socket. Turn the ignition on and test power, sound, balance, display, and steering controls. Test both front and rear speakers. A silent speaker may indicate a loose connection, not a faulty receiver.

Small details matter.

After testing, switch the ignition off and disconnect the battery again. Carefully guide the wires behind the receiver without sharp bends. Slide the unit into the dashboard until its clips engage. Reinstall the trim panels and screws in their original positions. Press each panel evenly to prevent rattles or uneven gaps. I once rushed this step and created a dashboard buzz that took another removal to fix. Leave no wire trapped under a trim edge. If the receiver sits crooked, stop and adjust the mounting bracket before tightening anything.

Test All Functions and Secure the Finished Installation

After installing a car stereo, test every function before replacing the dashboard trim. Turn the ignition through each position and confirm that the unit starts, shuts down, and remembers settings correctly. Check radio reception, audio balance, fader, volume, display brightness, USB playback, Bluetooth calling, and microphone clarity. Test steering-wheel controls if available. Verify the reverse camera and parking-related signals while the vehicle remains stationary. Keep the vehicle parked.

NHTSA reported 3,275 distracted-driving deaths in the United States during 2023. That figure makes safe testing important. Do not pair a phone or adjust menus during a road test. Instead, ask another adult to operate controls, or stop safely before making changes. Listen for buzzing, speaker distortion, sudden resets, or heat around the wiring. A quiet cabin can hide a loose connection.

Secure the finished installation with the correct brackets and fasteners. Route cables away from sharp metal, pedals, airbag paths, and moving panels. Leave enough slack for service, but prevent harnesses from rattling behind the dash. Check that the fuse rating matches the vehicle’s specification. I still recheck the trim after a short drive; one overlooked clip can create an annoying vibration. NHTSA’s vehicle safety guidance emphasizes maintaining clear driver attention, while professional installation practice supports strain relief and protected wiring. The job may look complete. It is not complete until the system works reliably and the dashboard stays quiet.

How to Install a Car Stereo Step by Step - Test All Functions and Secure the Finished Installation

Step Installation Stage Main Action Tools or Materials Recommended Check Typical Time Safety Priority
1 Prepare the Work Area Park on a level surface, switch off the ignition, engage the parking brake, and gather the installation materials. Trim tools, screwdrivers, socket set, wiring adapter, electrical tape, cable ties Confirm that the replacement stereo, mounting parts, and wiring adapter are compatible with the vehicle. 10–15 min High
2 Disconnect the Battery Remove the negative battery cable before disconnecting the factory stereo wiring. Correct-size wrench, protective gloves Make sure the cable cannot touch the battery terminal while work is in progress. 5 min Critical
3 Remove Interior Trim Release the dashboard bezel carefully and place removed screws and clips in a safe container. Plastic trim-removal tool, screwdriver, small container Check for hidden screws and avoid pulling trim panels against connected wires. 10–25 min Medium
4 Remove the Factory Stereo Undo the mounting screws, slide the unit forward, and unplug the original connectors without pulling on the wires. Screwdriver or socket set, labeled storage bags Inspect connectors for bent pins, corrosion, damaged locks, or loose terminals. 10–20 min Medium
5 Prepare the Wiring Match the vehicle-side wires with the stereo harness and make secure crimped or soldered connections as specified by the wiring guide. Wiring harness, wire stripper, crimp connectors or soldering tools, heat-shrink tubing Verify power, ground, speaker, illumination, and accessory connections before installation. 20–40 min Critical
6 Install the Mounting Kit Attach the appropriate dash brackets, pocket, trim plate, or mounting sleeve to the replacement stereo. Mounting brackets, screws, screwdriver, trim plate Confirm that the unit sits level and that buttons, vents, and surrounding trim will not be obstructed. 10–20 min Medium
7 Connect the Stereo Connect the prepared wiring harness, antenna lead, USB cable, microphone, steering-control interface, and any required auxiliary connections. Wiring harness, antenna adapter, cable ties, electrical tape Ensure each plug is fully seated and route cables away from sharp edges, pedals, and moving parts. 10–20 min High
8 Power On for Initial Testing Reconnect the battery, switch on the ignition, and check whether the stereo starts normally. Vehicle key or start control, flashlight Look for smoke, heat, unusual odor, blown fuses, warning messages, or intermittent power. 5–10 min Critical
9 Test All Functions Test radio reception, audio output, balance, fade, volume, source selection, USB playback, microphone operation, display controls, and steering controls if fitted. Test audio source, USB device, phone, and vehicle controls Confirm that every speaker plays clearly and that left/right and front/rear channels respond correctly. 15–30 min Medium
10 Secure the Finished Installation Bundle excess wiring, tighten the mounting screws evenly, slide the stereo into position, and reinstall the dashboard trim. Screwdriver, socket set, cable ties, trim clips Check that the unit does not move, wires are not pinched, and all trim panels sit flush. 15–30 min High
11 Complete the Final Check Start the vehicle, test the stereo again, and confirm that no dashboard warning lights or electrical issues appear. Vehicle controls, test media, visual inspection Verify ignition-off shutdown, memory retention, safe cable clearance, and normal operation during a short stationary test. 5–10 min High
Important: Wiring colors, connector layouts, dashboard removal methods, and battery procedures can vary by vehicle. Always follow the vehicle service information and the stereo installation instructions for the specific application.