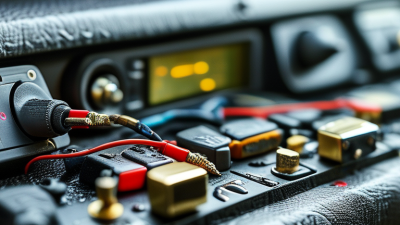
What Is Stereo Installation and How Does It Work?
Stereo installation is the process of fitting, connecting, and tuning an audio system inside a vehicle or room. It may involve a head unit, speakers, amplifiers, subwoofers, wiring, and sound-control components. The phrase sounds simple. The work is not.
S&P Global Mobility reported that the average age of vehicles in the United States reached about 12.6 years in 2024. Older vehicles often need updated audio equipment, while newer models may require careful integration with factory displays and steering-wheel controls. J.D. Power’s 2024 U.S. Initial Quality Study also identified infotainment as a persistent source of vehicle problems. These findings show why professional planning matters before replacing a dashboard unit.
A reliable stereo installation begins with system matching. A technician checks speaker impedance, amplifier power, fuse ratings, wiring routes, and available dashboard space. The source unit sends an audio signal through speaker wires or dedicated RCA connections. An amplifier increases that signal. Speakers then convert electrical energy into movement, creating sound through the cone and surround.
Details matter. A loose ground can introduce humming. Poorly sealed door speakers can lose bass. Incorrect gain settings may create distortion, even with expensive equipment. Installation manuals, manufacturer specifications, and recognized standards should guide each decision. The Consumer Technology Association’s market research continues to show strong consumer interest in connected audio products, but demand does not replace technical judgment.
No system is perfect. Cabin acoustics, factory electronics, and personal listening preferences can conflict. A careful installer measures, tests, adjusts, and explains limitations honestly. That practical process makes stereo installation safer, clearer, and more dependable.

What Is Stereo Installation and What Does It Include?
Stereo installation is the process of designing, fitting, wiring, and tuning a vehicle’s audio system. It includes more than replacing the dashboard receiver. A professional assessment checks the vehicle’s factory wiring, speaker locations, battery capacity, and available mounting space. Fit matters. The system may include a receiver, door speakers, subwoofer, amplifier, signal processor, wiring harnesses, and sound-deadening material. Each part must work together.
According to S&P Global Mobility, the average age of vehicles in the United States reached about 12.6 years in 2024. Older vehicles often need extra wiring adapters and careful power testing. A technician should measure voltage, inspect ground points, and protect cables from heat and moving parts. Poor grounding can create noise. That is not enough. The installer must also preserve steering-wheel controls, safety alerts, cameras, and other original functions where applicable.
Tuning completes the installation. It balances speaker levels, crossover points, equalization, and time alignment from the driver’s seat. Grand View Research’s 2024 automotive infotainment report projects strong market growth through 2030, with a compound annual growth rate near 9%. That growth reflects rising demand for connected, higher-quality in-car sound, but market figures vary by region and definition. A useful installation should match the vehicle and listener, not chase specifications alone. I have found that a modest system with accurate tuning can outperform expensive equipment installed without measurement. A second listening check is still worthwhile.
Which Components Are Used in a Stereo Installation?
A stereo installation is the process of fitting audio components into a vehicle and connecting them safely. The system begins with the head unit, which controls music, volume, balance, and audio sources. It sends signals through wiring to the speakers and amplifier.
Speakers convert electrical signals into sound. An amplifier strengthens those signals when louder, cleaner audio is needed. A subwoofer handles deep bass, while sound-deadening material can reduce vibration inside doors and panels.
Installers also use wiring harnesses, fuses, mounting brackets, and signal adapters. Each part has a specific job. Incorrect wire sizing can create heat, signal loss, or equipment failure. A secure ground connection matters too.
I have seen installations where the components were excellent, but poor grounding caused unwanted buzzing. The fix was simple, but finding it took time.
Tips:
Check the vehicle’s electrical capacity before adding an amplifier. Keep power cables away from signal cables when possible. Test every speaker before securing door panels. Leave enough wiring for future adjustments. Small details matter.
Stereo installation is not only about fitting larger speakers. The head unit, amplifier, speaker sensitivity, enclosure design, and cabin size must work together. A powerful amplifier may sound harsh with poorly matched speakers. A modest system can sound balanced after careful tuning. Even experienced installers can overlook panel rattles or incorrect polarity. Rechecking the work is worthwhile, especially after the first drive.
How Are Stereo Wiring and Audio Settings Configured?
Stereo installation is the process of fitting an audio receiver, speakers, amplifiers, and related connections into a vehicle. The work begins with checking the vehicle’s wiring diagram and available space. Power, ground, speaker, and accessory wires must match correctly. A loose ground can create humming, while reversed speaker polarity may weaken bass and sound strangely wide.
Stereo wiring should be secured away from pedals, sharp metal edges, and moving parts. Use insulated connectors and test each channel before replacing the trim panels. Audio settings then shape the final result. Set the receiver’s balance and fader at the center. Adjust the equalizer with familiar music, not only loud test tones. Gain controls should increase clarity, not simply volume. Crossover settings also matter, especially when separate speakers handle different frequency ranges. I have found that small adjustments often outperform dramatic changes. Still, listening position and cabin materials can make one setting imperfect.
Tips: Label every wire before connecting it. Photograph the original layout. Test the system at low volume first. If one speaker sounds thin, check polarity and the connector. Avoid placing cables under tight trim. Recheck the ground when noise remains. Do not chase perfect numbers; real cabins rarely behave like laboratories.
How Is a Newly Installed Stereo Tested and Maintained?
After stereo installation, testing should begin before the customer leaves.
A technician checks wiring polarity, grounding, fuse protection, and speaker connections. Each channel must play clearly. No channel should sound weaker or distorted. Do not trust the first song.
The system is tested at low, medium, and high volume. A multimeter verifies voltage stability, while an oscilloscope can reveal clipping from excessive gain. A frequency sweep helps identify dead speakers, rattles, and unwanted noise. Technicians should also test Bluetooth calls, steering controls, backup-camera audio, and memory settings.
The Consumer Technology Association’s 2024 U.S. Consumer Technology Sales and Forecast report valued domestic consumer technology sales at approximately 512 billion dollars.
That scale shows why consistent testing matters across increasingly complex electronic systems. Still, a checklist cannot replace careful listening.
Maintenance starts with simple habits.
Keep vents clear, inspect exposed cables, and avoid running the system at maximum volume for long periods. Every few months, check for loose trim, buzzing panels, or intermittent sound.
The 2023 SEMA Market Report estimated the U.S. specialty-equipment market at about 52.3 billion dollars, reflecting strong demand for aftermarket upgrades.
That demand also increases the need for qualified installation and follow-up service. A rushed final listen is an easy mistake. Rechecking after several days can reveal heat-related faults or vibration problems that were invisible on installation day. Acoustic tuning may also need adjustment after the speakers settle.